-
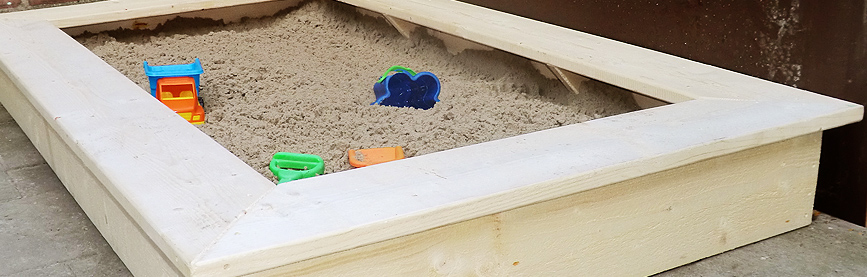
Find the best location
The sandpit shouldn’t be exposed to full sunlight. The best location is half in sunlight and half shaded. But it also shouldn’t be in a dark corner, or in a moist location. The sandpit is usually a place where children are running around with a lot of activity. It’s ideal to have a shock-absorbent path made of rubber tiles around the sandpit. Also remember that dogs and cats love sandpits, so make sure you can cover the sandpit with a cover or tarpaulin.
-
Dimensions
A sandpit is mainly there for young children, so it’s only temporary. Of course the size has to be matched to the available space in your garden. If you want to make the sandpit higher, you can simply use more planks. But don’t make a sandpit for small children too large – they often play alone, and can feel lost in a large sandpit.
-
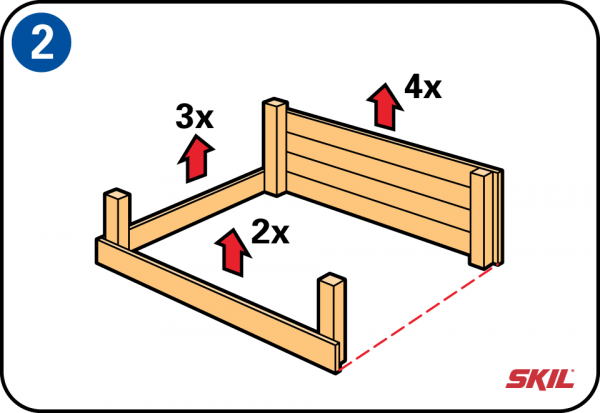
Digging out the ground
To start with, you need to mark out the perimeter of the sandpit with small posts and string. Dig out around the edges with a spade and then finish digging out the whole area to a depth of around 20 cm.
-
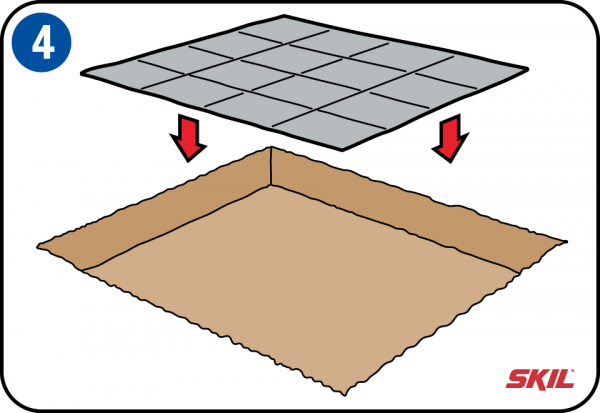
Anti-root membrane
Make sure the bottom of the sandpit is flat, and remove any roots and stones with a shovel. Line the dug-out area with ant-root membrane. The big advantage of this material is that it allows rainwater to drain away but stops weed growth.
-
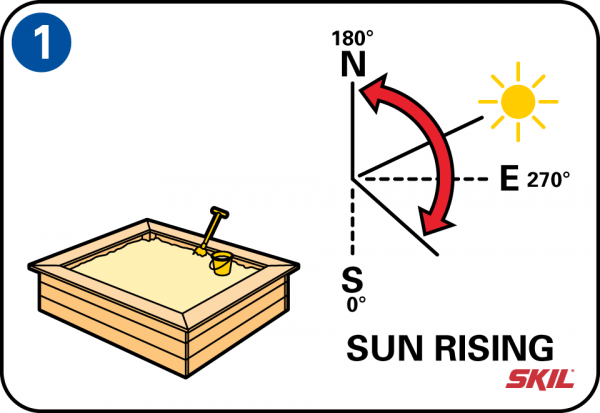
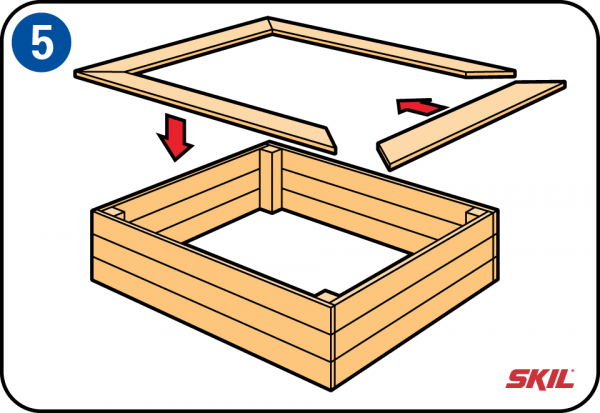
Building the walls
Saw the planks for the side walls and the fence posts to the desired size. Drive the posts into the ground at the corners, and fit the planks to the posts. Pre-drill the screw holes to prevent splitting. Each side consists of 3 or 4 planks of the same length. Use 4 planks to make the top edges of the sandpit, and saw the ends at 45° so they fit together neatly. Screw the edge planks firmly to the tops of the fence posts.
-
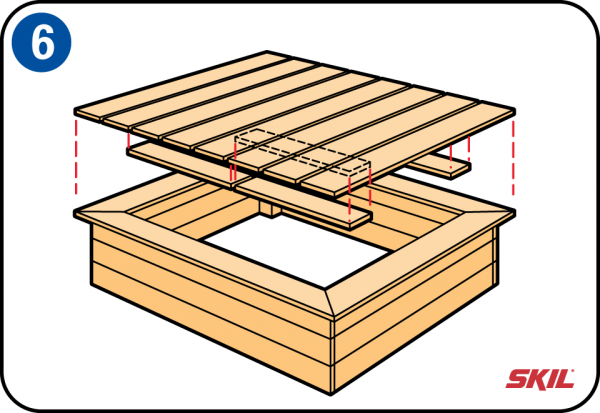
Making a cover
You want to be able to cover the sandpit to keep dogs, cats and garden debris out. Fix the planks at right-angles onto 2 similar planks (or narrower fence posts), with a gap of about 1 cm for ventilation. If you make the cover in 2 parts it’s easier to lift it off and replace it.
-
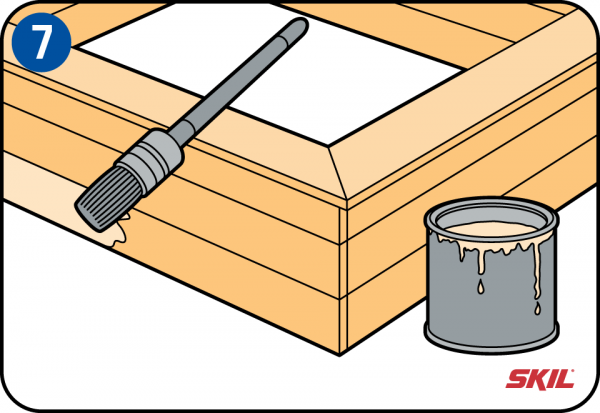
Finishing
Treat the wooden planks and posts with a protective varnish for a longer lifetime.
-
Filling
Place the sandpit on the ground so it is level, and fill it with sandpit-grade sand. 12 bags of 25 kg is enough for a sandpit of 1.5 m x 1.5 m. You’ll need to replace the sand regularly for hygiene reasons.